Free e-book! "The complete guide on how to avoid mistakes in creating mobile apps" DOWNLOAD NOW
 ![]()

Free e-book! "The complete guide on how to avoid mistakes in creating mobile apps" DOWNLOAD NOW ![]()
Dominika Czarnecka
16/04/2018 • 5 min read

Xcode: Apple’s official IDE for iOS programming, which’s got 2,5 stars in AppStore. How to upgrade Xcode, how to use some tips & tricks to make it easier to use, how to add useful features or helpful plugins? Here I am, to help you, to advise you, to show you some ways to make Xcode more… accessible.
I assume that this tutorial is for beginners to show them
there’s more than what by default Xcode and Swift offer. But if someone experienced found it helpful that makes me happy 🙂

I this article I will show you:
This tutorial is dedicated for Swift and Xcode 9.
Wouldn’t it be better to use „text”.localized rather than NSLocalizedString(“text”, comment: „”)?
If you don’t need comments in your localized files then this solution may interest you. I modified an idea form here. The original framework is more than I need to my usual projects, but it enables changing language form code, so if someone is interesting place check it also.
Now, to work!
Add this extension to your project:
To generate localized.strings copy the genstrings.swift file into your project’s root directory and run:
./genstrings.swiftI modified the original program to save the output to file. The default is localized.string, but if you want another file just add file name and type as argument. To modify input directory run it with a name and a type of a destination file and a path to your project directory as arguments.
It will search through all .swift files to export .localized strings to the destination file in the directory you’ve chosen.
And that’s it 🙂 I hope you will find it helpful and time-saving.
Are you tired of swiping left/right from Xcode to simulator and back? Here’s trick for you!
But be aware that this is experimental, not supported by simulator yet and you’re doing it at your own risk.
There shouldn’t happen anything unexpected, but you can ask someone more experienced to help you.
Follow this steps:
If you’ve got MacOS 10.11 or higher you need to disable SIP(System Integrity Protection). If you want open this article on another device, because you need to go to Recovery Mode.
To turn off SIP:
command + R while restarting until Apple logo appears).csrutil disable and press enter.Not in normal mode to enable fullscreen simulator:
Create AppleInternal folder by tapping in terminal:
sudo mkdir /AppleInternalNow alter restarting simulator select Internal Menu -> check Allow Fullscreen Mode.
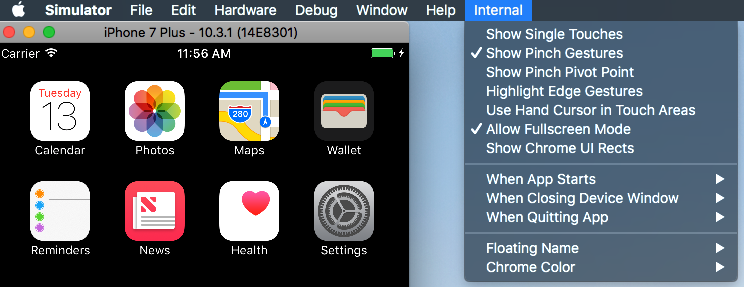
And finally, you can drag and drop Simulator to fullscreen Xcode!
Remember to remove directory AppleInternal by tapping in terminal
sudo rmdir /AppleInternalAnd to enable SIP by tapping in a terminal in Recovery Mode:
csrutil enableEverything is wireless, debugging can be also!
Of course, for the first debug on your new device you need to be connected via wire, but only for the first time 😉 After that just
command + shift + 2)What’s good from TODO, when you have to look for it through all files. So… maybe use it as a warning! You will always see that something needs your attention.
And that’s it! It’s all set up 🙂 Now after every build, you will see new warnings like this:
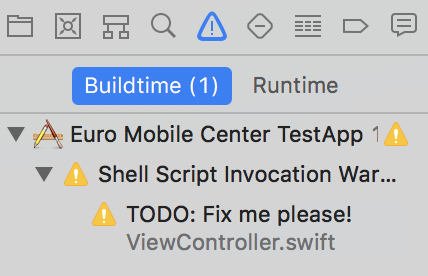
![]()
Or maybe you’re a perfectionist who doesn’t want to have any warnings in your projects? You can always treat them like errors.
Treat Warnings as Errors to Yes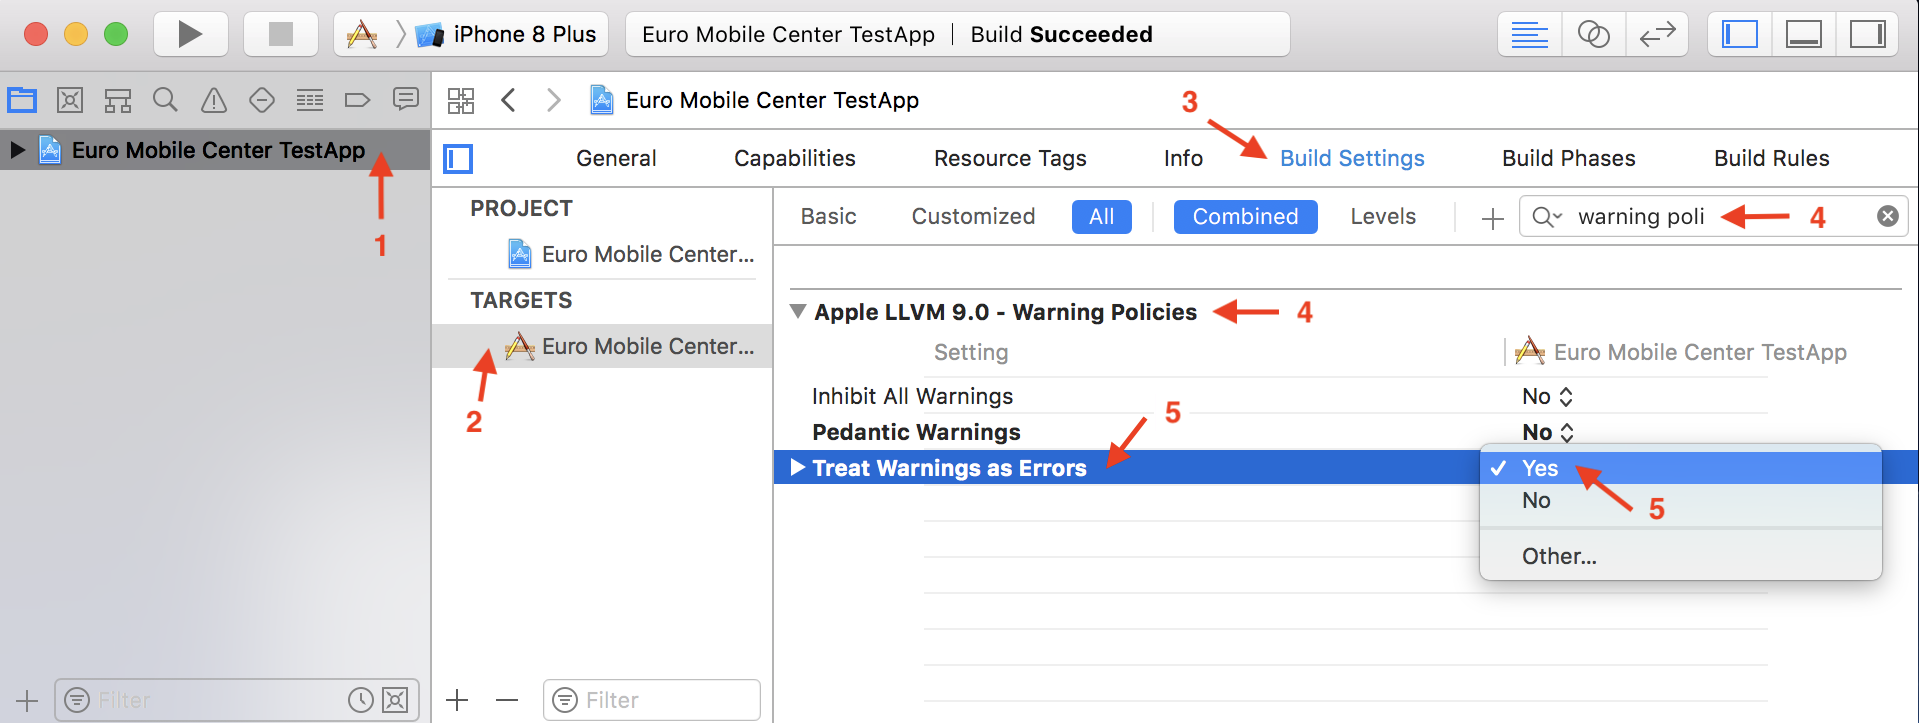
Now every warning will be treated as an error and you want to be able to build your project when there’s even one warning.
New in a project? Or maybe the project is big to dive in directories? You can choose one from this ways to find what you’re looking for 🙂
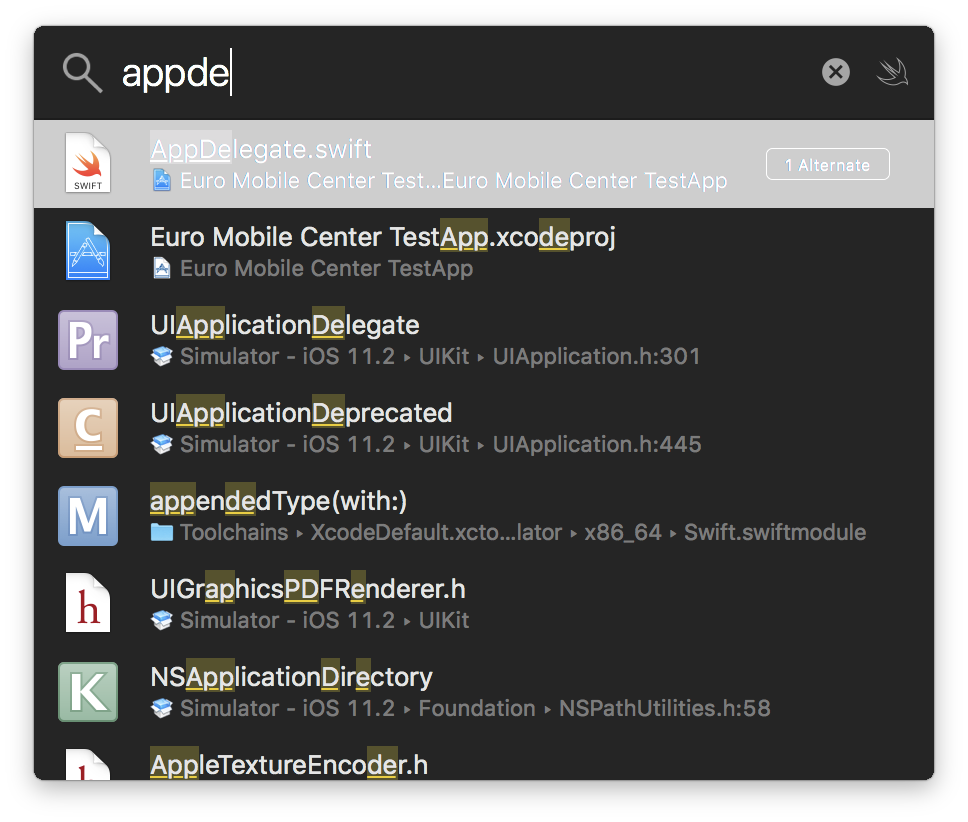
Quick search: command + shift + O
It works like command + space, but only with files. So whenever you are looking for some file and you don’t know where it is just type command + shift + O and start searching!
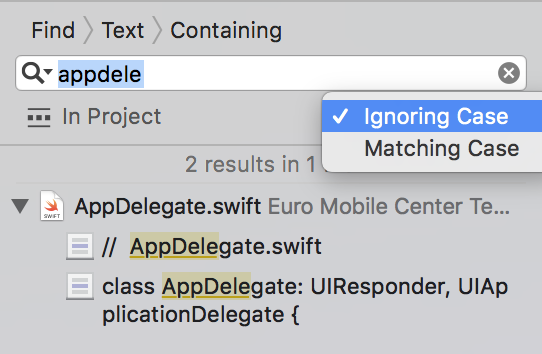
Find Navigator (command + shift + F)
If you are looking for a concrete phrase, but you don’t know in with a file it is, just go to Find Navigator and type it! You have some advanced parameters such as ignoring / matching case, starts with / ends with / contain / matching word.
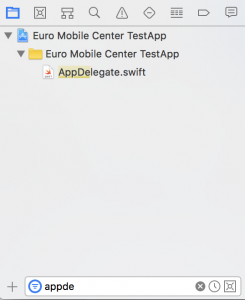
Search on the bottom of Project Navigator
There’s also filter on the bottom of Project Navigator. Start taping your text and you will see only files which names contain that text.
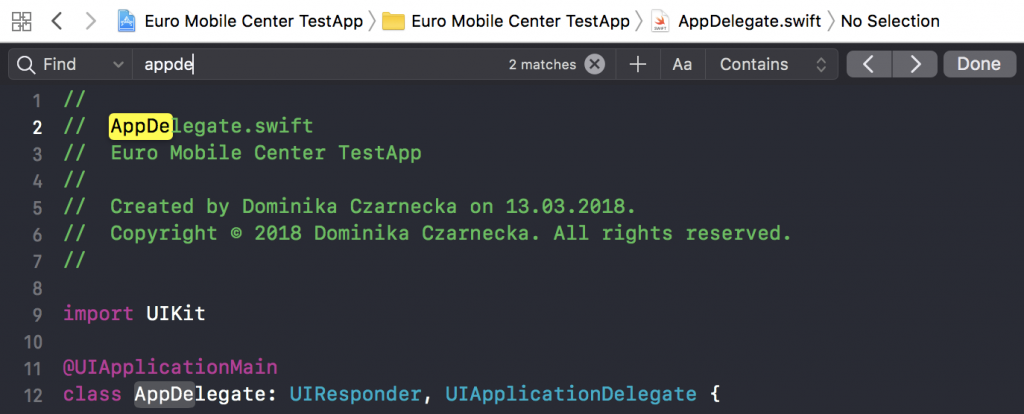
Cmd + F
You can always tap command + F to look for text in a current file or in an active console.
iOS Developer at ITgenerator

For Business
It is fast, safe, beautiful and costs as much as a nice car - except it is a mobile app5/5 - (1 vote) Mobile apps are everywhere. You wake up in the morning and check WhatsApp or messenger, you go for a run with Endomondo, play games like Minecraft...
Keep reading
ITgenerator sp. z o.o.
Poland
ul. Bielska 5C/2
61-435 Poznań
![]()
![]()